This project came about as Cathy and I wanted quick access to our server based music collection without having to boot up a PC every time. A chance stumbling across the Barix Extreamer led to a search for good quality self-powered speakers that would fit with our decor. None could be found (at a sensible price anyway), so this design was born!
Just an amplifier eh?
Included in the project is an LCD display module which shows the Playlist name, the Artist name and the Song title.
Main Ingredients
1 off Barix Exstreamer networked MP3 player with remote control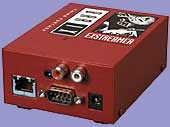
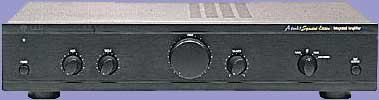
1 off Cambridge A1mk3 v3 audio amplifier
1 off All Shore Industries ASI402A 2x40 Blue LCD module
1 off Display Interface Module (my own design)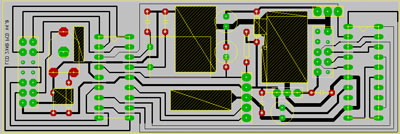
Recipe
First, the usual disclaimer. These are not instructions for DIY, just notes on what I did. Mains voltages are involved and need to be treated with respect! And forget any warranties that you may have...
The Exstreamer was carefully shelled, the left, right and headphone audio sockets and the psu socket were unsoldered and removed. This left the network and RS232 connectors, for which holes were cut out of the rear of the amplifier case.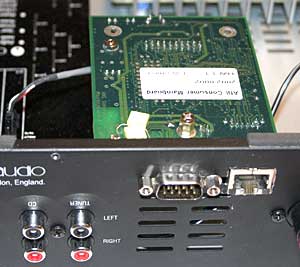
There were no suitable low-voltage taps on the built-in amplifier transformer, so the plug-top PSU that shipped with the Exstreamer was hacked about a bit to remove the plug pins and then wired directly to the amp side of the mains switch. The output lead was snipped and soldered directly to the Exstreamer, using the holes vacated by the psu socket.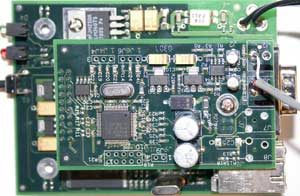
Similarly, a short piece of twin audio lead was soldered to the Exstreamer with a connector attached to the other end - I actually used a spare CDROM drive audio lead for this, just needed to change the order of the pins in the connector. The Cambridge amp has the facility for adding a Phono pre-amp inside which made for a handy spot to insert the audio. Two links were snipped and an existing connector used to input the audio. The top-print on the board made it clear what to do!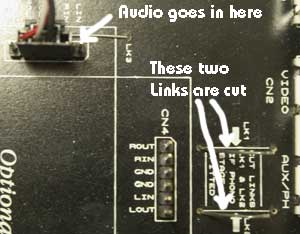
That was pretty much it for the amplifier - fortunately, spare audio output ICs (LM4766T) are available for 4 UK pounds plus tax from Farnell for when one accidently shorts out the heatsink to ground, it normally sits at -35V!
Most of the project work went into designing the LCD interface board (containing a PIC16F628 microcontroller, a MAX233 serial interface ic and a 5V regulator) and writing the software. The module has connectors for in-circuit programming and to connect the IR receiver/demodulator (lifted out of the supplied IR kit) and the PCB is designed to plug straight onto the back of the LCD module.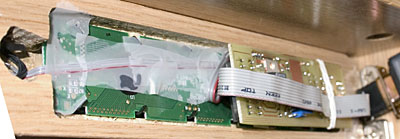
For installation in our dining room, I decided to mount the amplifier hidden inside a cupboard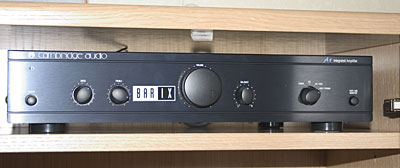
and the LCD display inside a cupboard with glass doors. I cut out a piece of wood from a spare drawer front to match the furniture and machined out the back to fit the LCD and IR modules.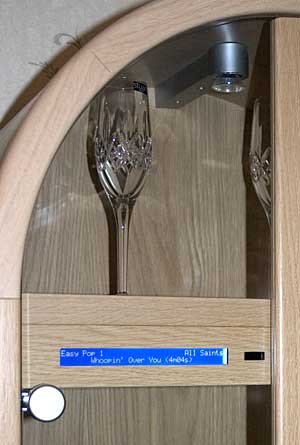
A serial lead connects this to the Extreamer.
How does it work?
For those of you who know the Exstreamer well, you will know that it does not currently support ID3 tags and therefore you may be asking where I obtain the Artist name from?
Well, it can come from one of two places. The first is extracted from the song file path, which on my system is well defined and all tracks are at the same directory level: "\\media\cds\genre\artist\album\nn-track (mm:ss).mp3". (nn is the cd track number, mm:ss is the track length).
The second is an override which comes into play if the song name is divided by space dash space or two spaces. This would occur with a compilation disc of various artists. In this case, it is assumed that the first part of the song name is the artist and the second is the song. If and when the Exstreamer software gets around to supporting ID3 then I'll be able to make my software be more generic :-)
In operation, the Exstreamer has the command STATEFEEDBKSERON (c=74) set in the initialisation string. This forces a DEVSTATE answer to be sent out through the serial port each time there's a state change, such as play, stop, pause or song change. The PIC receives this and extracts the song and artist information from the SONG tag and then issues a GETPLAYLISTNAME for, believe it or not, the playlist name!
Now comes the tricky part (for a small micro with very little RAM that is) where everything is formatted for the display as follows:
The playlist name is displayed on the top line, left justified and truncated at 30 chars if necessary. If truncated, a special character of three dots is displayed in the 30th column, or in the 29th column if the 30th was the first letter of the next word (which will be blanked).
The artist name is displayed on the top line, right justifed and if necessary, truncated to leave two spaces after the playlist name.
Finally, the song name is displayed on the bottom line, center justified or left justfied and truncated if more than 40 chars. The leading nn- and trailing .mp3 chars are first removed.
That's it. I may publish details on the design of the display interface module if enough people show enough interest!
Oh - anyone have a use for an empty Exstreamer case...